
Finding the node: where to actually cut
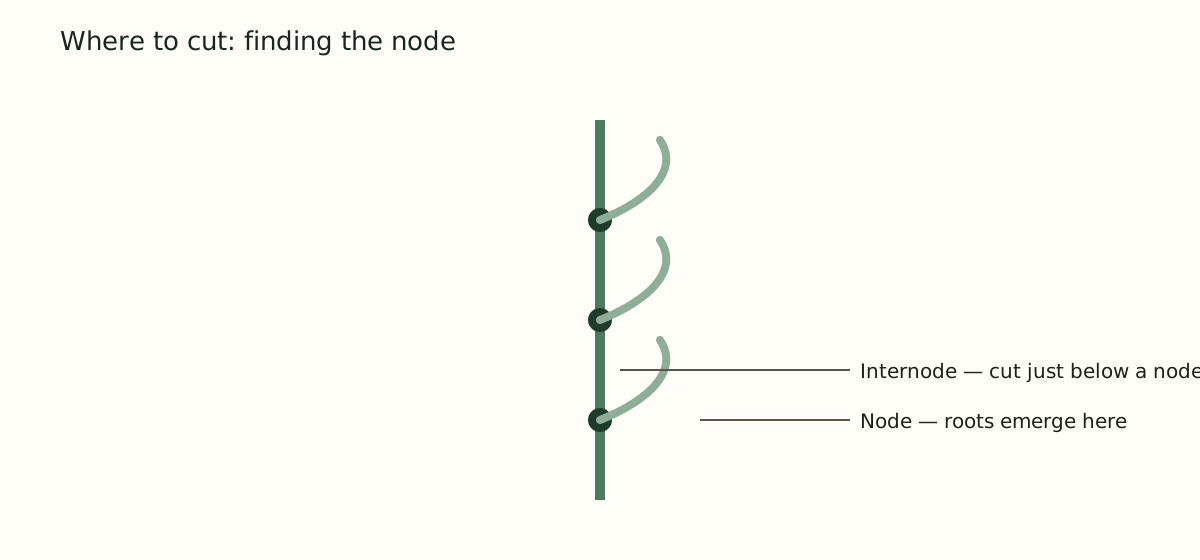
A node is the small point on a stem where a leaf, branch, or aerial root emerges, or has previously emerged. It contains the concentrated plant cells capable of producing new roots when placed in the right conditions — a section of stem without a node, called an internode, generally cannot root on its own no matter how favorable the conditions surrounding it are. For most common houseplants, the correct cut is made about a quarter to half an inch below a node, using clean, sharp scissors or pruning shears to avoid crushing the stem's internal tissue, which can slow healing and increase the risk of rot at the cut site.
A good cutting for most vining or trailing plants includes at least one to two nodes and at least one healthy leaf, since the leaf continues photosynthesizing and supporting the cutting while it develops roots underwater or in soil. Cuttings with no leaves at all generally struggle to root successfully, since they have no ongoing energy source to sustain the process through to completion.
The three main propagation methods
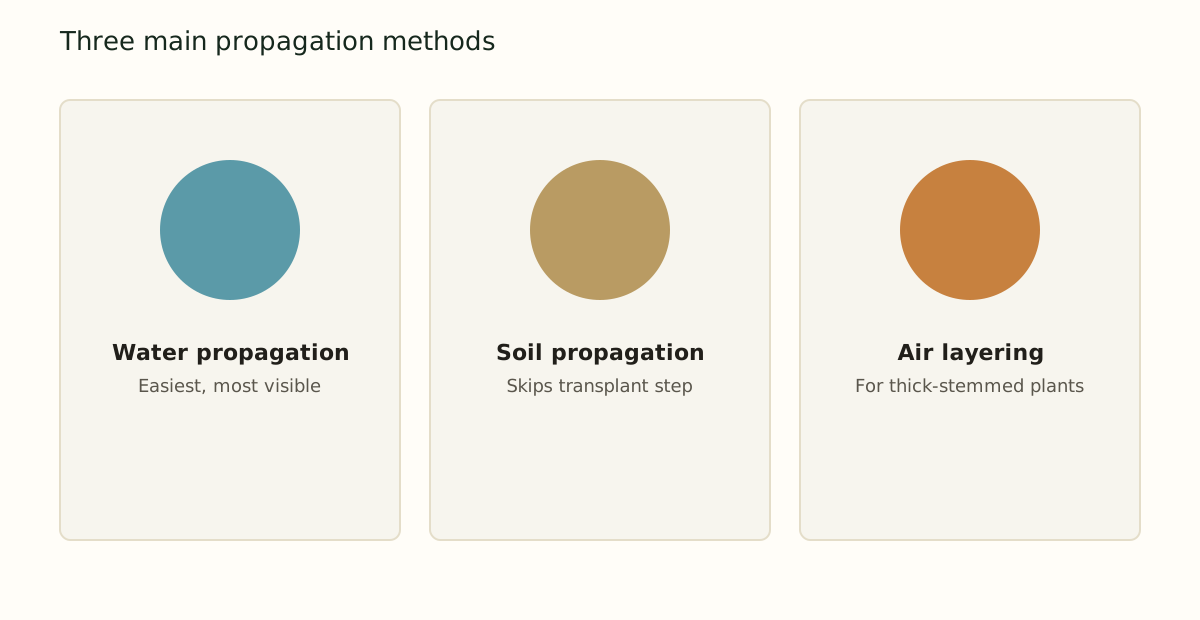
Water propagation is the most popular method for beginners because it's visually satisfying — you can watch roots develop in real time through the glass, which makes it easier to stay engaged and check progress — and it works reliably for a wide range of common trailing and vining plants. Soil propagation skips the eventual transition from water to soil entirely, which can reduce transplant shock for some species, though it requires more faith since you can't see root development directly and have to rely on the gentle-tug test instead. Air layering is a more advanced technique reserved for plants with thick, woody, or otherwise difficult-to-root stems, where roots are encouraged to form on the still-attached parent plant before the new section is separated.
Water propagation, step by step
- Make your cut just below a node, using a cutting with at least one to two nodes and one or two healthy leaves.
- Remove any leaves that would sit underwater, since submerged leaves tend to rot and can foul the water.
- Place the cutting in a clean glass or jar of room-temperature water, with the node submerged and any remaining leaves above the waterline.
- Set it in bright, indirect light — not direct sun, which can overheat the water and stress the cutting.
- Change the water every five to seven days to keep it fresh and oxygenated, which meaningfully speeds root development and reduces the risk of rot.
- Wait for roots to develop, which typically takes two to six weeks depending on the species, season, and light conditions.
Soil propagation, step by step
- Make your cut the same way as for water propagation, just below a node.
- Optionally dip the cut end in rooting hormone, a powder or gel that can speed root development and improve success rates, particularly for plants that are naturally slower or more reluctant to root.
- Insert the cutting into moist, well-draining potting mix, burying at least one node comfortably below the soil surface so it stays in consistent contact with moisture.
- Cover loosely with a clear plastic bag or a propagation dome to maintain high humidity around the cutting while it lacks roots to take up water on its own.
- Keep the soil consistently moist but not waterlogged, and check for root development after three to four weeks by gently tugging — resistance indicates roots have formed.
Air layering for thick-stemmed plants
Air layering works differently from the two methods above: instead of removing a cutting and hoping it roots, you encourage roots to form directly on the still-attached stem, then separate the new plant only once roots are already established. This significantly improves success rates for plants that root poorly or slowly from a standalone cutting, including fiddle leaf fig and rubber plant, both of which are notoriously unreliable when propagated as simple stem cuttings placed straight into water or soil.
- Choose a section of stem below a node and make a small upward-angled cut about a third of the way through the stem's diameter, being careful not to cut all the way through.
- Insert a toothpick or small wedge into the cut to keep it slightly open, then wrap the wounded area with moist sphagnum moss.
- Cover the moss with plastic wrap and secure both ends with tape or twist ties to hold in moisture, checking periodically that the moss hasn't dried out.
- Wait for roots to develop inside the moss, which can take several weeks to a few months depending on the species.
- Once a healthy root mass is visible through the moss, cut the stem just below the new roots and pot the newly rooted section as an independent plant.
Setting up a simple propagation station
A dedicated spot for cuttings, rather than scattering individual jars around the house, makes it easier to monitor progress and maintain consistent conditions across an entire batch. A propagation station can be as simple as a tray of small glass jars or vessels grouped together on a bright windowsill, or as involved as a dedicated shelf with supplemental grow lighting for year-round propagation regardless of season or available natural light. Grouping cuttings together also makes the weekly water-change routine faster, since you're working through several vessels in one pass rather than remembering scattered individual jars throughout different rooms of the home. Clear glass is generally preferable to colored or opaque containers for water propagation specifically, since it lets you monitor root development and water clarity at a glance without disturbing the cutting itself.
Understanding rooting hormone options
Rooting hormone, where used, comes in a few common forms, each with slightly different application characteristics. Powder formulations are the most widely available and simplest to use — the cut end is dipped directly into the powder before planting. Gel formulations cling to the cut surface somewhat better than powder and are often preferred for vertical cuttings where powder might fall away before the cutting is planted. Liquid concentrate formulations are typically diluted with water and used either as a quick dip or a longer soak, and are more commonly used by more experienced growers propagating in larger batches. For a beginner working with a handful of cuttings from typical houseplants, powder or gel rooting hormone is more than sufficient, and the choice between the two is mostly a matter of personal preference rather than a meaningful difference in results.
Which method fits which plant
| Plant type | Best method | Typical rooting time |
|---|---|---|
| Pothos, philodendron | Water propagation | 2–4 weeks |
| Monstera | Water or soil propagation | 3–6 weeks |
| Snake plant (leaf cuttings) | Soil or water propagation | 4–8 weeks |
| Succulents (leaf or stem) | Soil propagation (after callusing) | 2–6 weeks |
| Fiddle leaf fig, rubber plant | Air layering | 4–10 weeks |
| African violet (leaf cuttings) | Water or soil propagation | 3–5 weeks for roots, longer for plantlets |
Succulent leaf and stem cuttings are a partial exception to the general process above — they typically need to sit out and callus over (form a dry, sealed layer over the cut surface) for a day or two before contacting soil or water, since planting a fresh, unhealed cut risks rot for these particular water-storing plants, whose thick, moisture-rich tissue is especially prone to fungal and bacterial issues if buried or submerged while the wound is still open.
Why timing affects propagation success
Propagation success rates are meaningfully higher during a plant's active growing season — typically spring through early summer for most common houseplants — when the plant has abundant stored energy and hormonal signals that favor new growth, including root development. Cuttings taken during winter dormancy, when a plant's metabolic activity slows considerably, often take noticeably longer to root, and some cuttings that would root reliably in June may simply stall or rot in January regardless of otherwise correct technique. This doesn't mean winter propagation is impossible — many successful propagators do take cuttings year-round — but a beginner is likely to see faster, more consistent, and more encouraging results by starting with spring or early summer cuttings, when nearly every variable is working in their favor rather than against them.
Knowing when a cutting is ready to pot up
For water-propagated cuttings, wait until roots are at least one to two inches long before transferring to soil — moving too early, while roots are still very short and not yet capable of efficient water uptake, increases transplant stress and failure risk considerably. For soil-propagated cuttings, gently tug the cutting after several weeks; noticeable resistance indicates roots have anchored it in place, at which point it can be treated as an established plant and watered according to its species' normal schedule rather than the higher-humidity routine used during the initial propagation period.
Cuttings that have rooted in water sometimes struggle briefly when first moved to soil, since water roots and soil roots have slightly different structures. A gradual transition — keeping the newly potted cutting in a humid environment for the first week or two — smooths this adjustment.
Why cuttings fail, and how to avoid it
- Cutting without a node is the single most common beginner mistake — always confirm at least one node is included in the cutting and will end up submerged in water or buried in soil.
- Using a dull or dirty cutting tool crushes stem tissue and can introduce pathogens into the wound, both of which reduce rooting success and increase the risk of the cutting rotting before it has a chance to establish roots.
- Letting water propagation cuttings sit in stagnant, unchanged water encourages bacterial growth and rot rather than root development.
- Propagating during winter dormancy generally takes noticeably longer and has a lower success rate than propagating during the active spring and summer growing season.
- Moving a cutting to soil too early, before roots are established enough to support the transition, is a common cause of otherwise successful cuttings failing at the last step.